Creating high-quality print-on-demand products starts with well-prepared artwork. Follow this guide to make sure your designs look sharp, vibrant, and exactly how you imagined.
I. General Design Guidelines
These rules apply to most Onospod products unless a product page says otherwise.
1. Download the Product Template
Every product has its own template to help you position and size your artwork correctly.
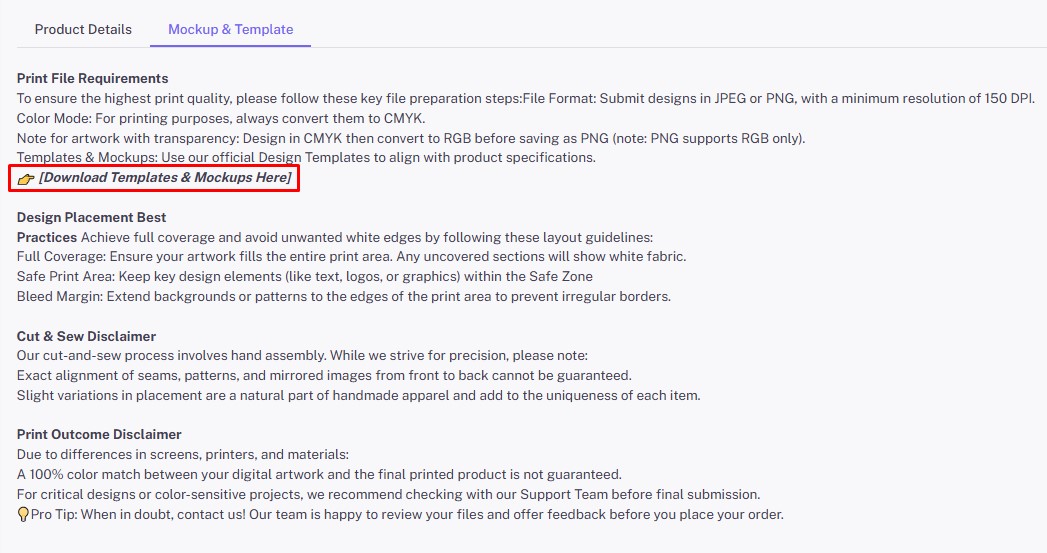
Go to the product page
Scroll to the Mockup & Template section
Click the download link
2. File Type & Size
Accepted formats: JPG or PNG
Artwork upload limit:
CSV & API import orders: Maximum 100MB
Manual upload orders: Maximum 10MB
3. Resolution / DPI
Recommended: 150 DPI or higher for crisp, clear prints
Avoid low-resolution images—upscaling small files will make them blurry or pixelated
Always start with the largest, highest-quality file possible
4. Colors
Designs are printed in CMYK. If your file is in RGB, it will be converted before printing
For PNGs with transparency, design in CMYK first, then convert to RGB before uploading
Expect slight differences between on-screen colors and printed colors due to monitors, fabric color, and material type
Rich Black formula for large areas: 100% Black + 10% Cyan (for deeper, even coverage)
5. Safe Print Area & Bleed
Keep important elements (text, logos) inside the Safe Print Area—at least 5mm from edges
Extend your background to the Bleed Area so there are no unwanted white edges
Thin lines: keep at least 1pt thickness for clarity on fabric
Avoid very light or very dark small text—stick to 10pt+ font size for readability
II. Printing Type Guidelines
1. Placement Printing (DTG/DTF)
This method prints your design in a specific location on the garment.
Examples:
Women’s T-shirts, Unisex T-shirts, Sweatshirts, Hoodies
Tips:
Use solid colors—low opacity or transparency can show the fabric color underneath
Avoid designs too close in color to the garment (e.g., dark gray on black)
All design files must extend fully to the print frame without leaving any white margins. Empty space will reduce the actual printed size, resulting in discrepancies compared to the mockup.
Expect slight placement variations due to the printing process
Design Types Not Accepted by ONOSPOD
Files with smoke effects, lightning effects, or gradient fades from dark to light are not accepted. These effects may produce visible white edges from the adhesive layer after printing, negatively impacting product quality.
Files with incomplete background removal (unclean cutouts, visible smudges, or stray marks) will be rejected. Sellers must ensure their designers thoroughly clean and isolate the artwork to maintain printing quality and avoid delays in order processing.
Common Sizes:
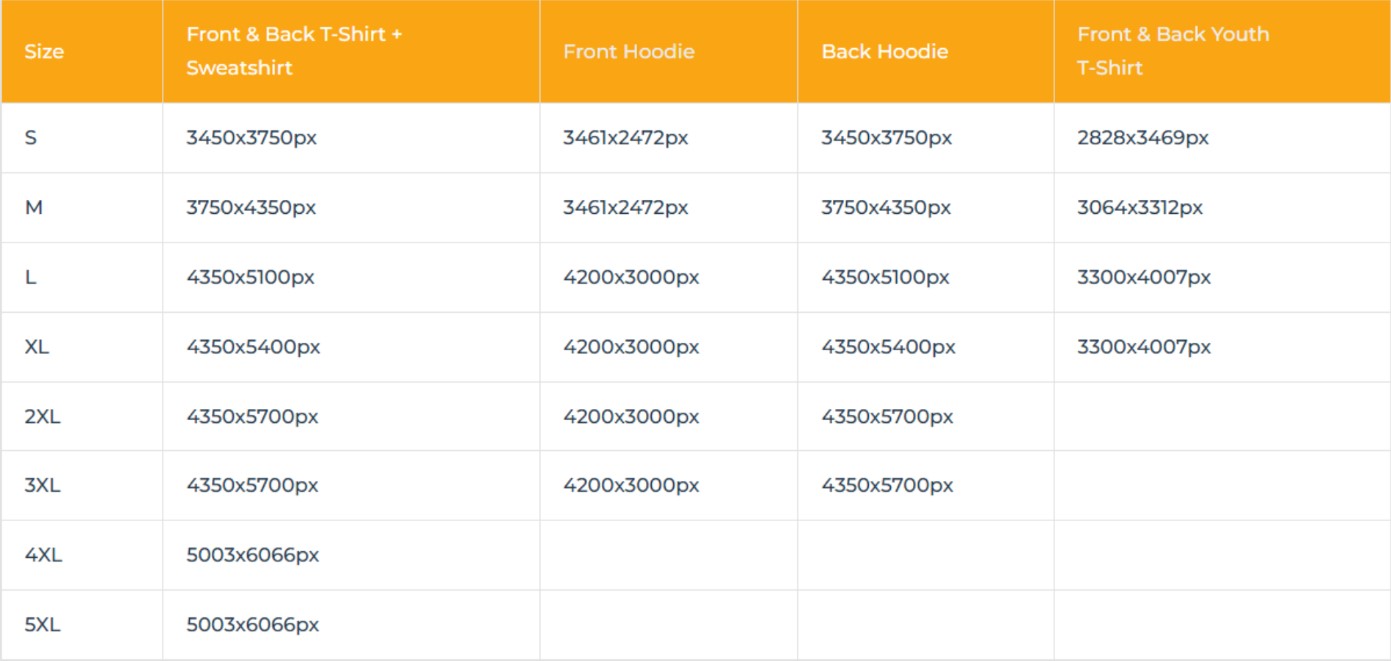
Full Front: Print area up to 15×18″ (scaled for smaller sizes)
Size: 4500x5400px
DPI: minimum 300
Format: PNG
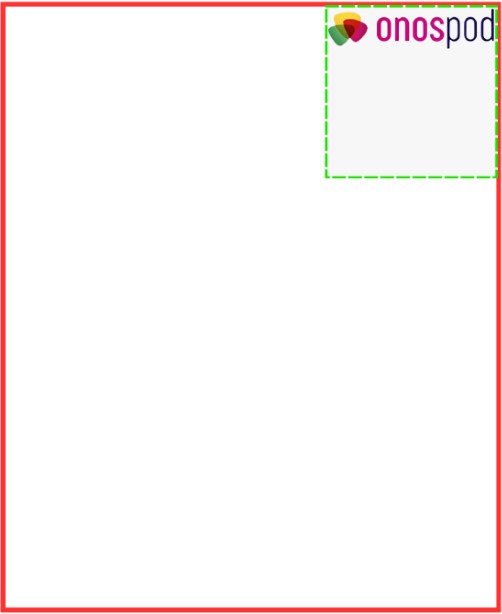
Left Chest: Print area ~5×5″
Size: 4500x5400px
DPI: minimum 300
Format: PNG
Template: Download here
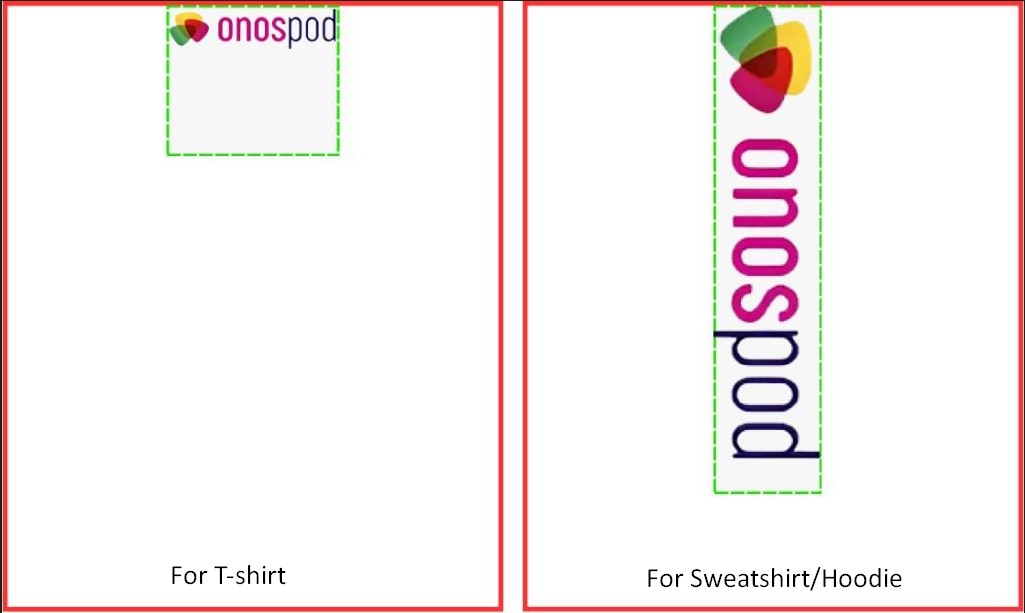
Note: For all left chest designs, position the artwork at the top right corner of the design frame, ensuring it is fully within the green safe area shown in the provided template.
Sleeve: Print area ~4×4″ (T-shirt), ~4×10″ (Sweatshirt/Hoodie)
Size: 4500x5400px
DPI: minimum 300
Format: PNG
Template: Download here
Note: All designs must be positioned at the very top of the frame.
2. All-Over Printing (AOP)
This covers the entire product with your design, often used for cut-and-sew apparel.
Examples:
AOP Hoodie, AOP T-shirt, AOP Baseball Jersey, AOP Hawaiian Shorts
Tips:
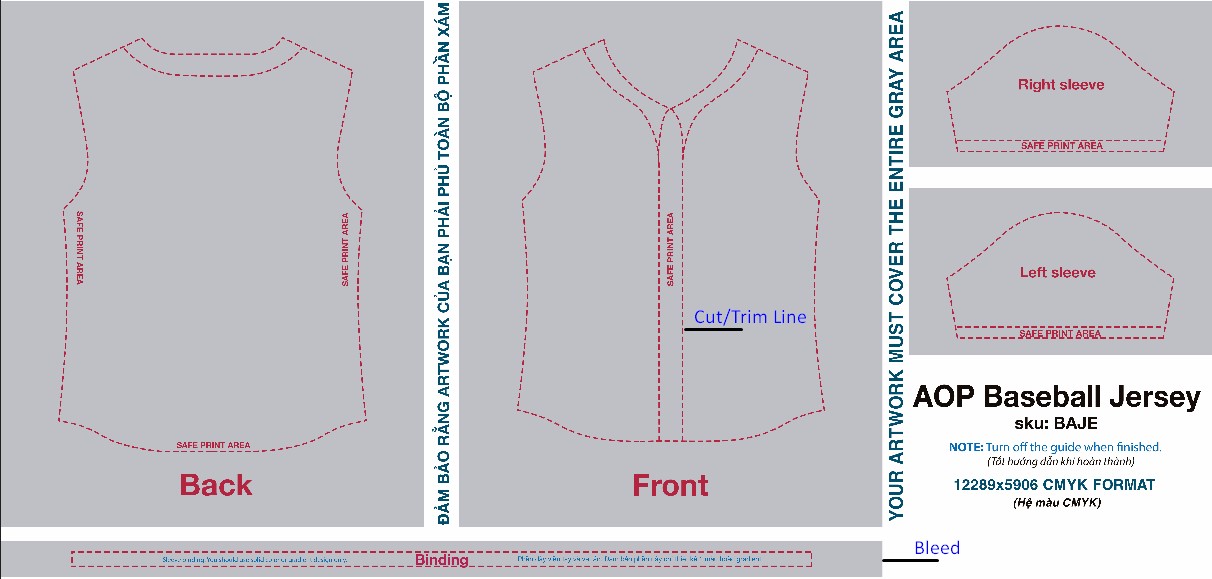
Extend the design to fill the full grey template area
Use seamless, continuous patterns for best results
Keep important elements away from seams, collars, and folds
III. How to Use Product Design Templates
Step-by-Step Guide with Baseball Jersey Example
Video Guide Here
Step 1: Download the Baseball Jersey Template
Go to onospod.com.
Use the search box to find the Baseball Jersey product you want to design.
Open the product page, and click the “Template and Mockup” tab.
Download the Template and Mockup file for the All-Over Print Baseball Jersey.
Step 2: Open the Template in Photoshop or Photopea
Open Photoshop or the free online editor Photopea.
Drag and drop the downloaded template into your workspace.
Template Guide:
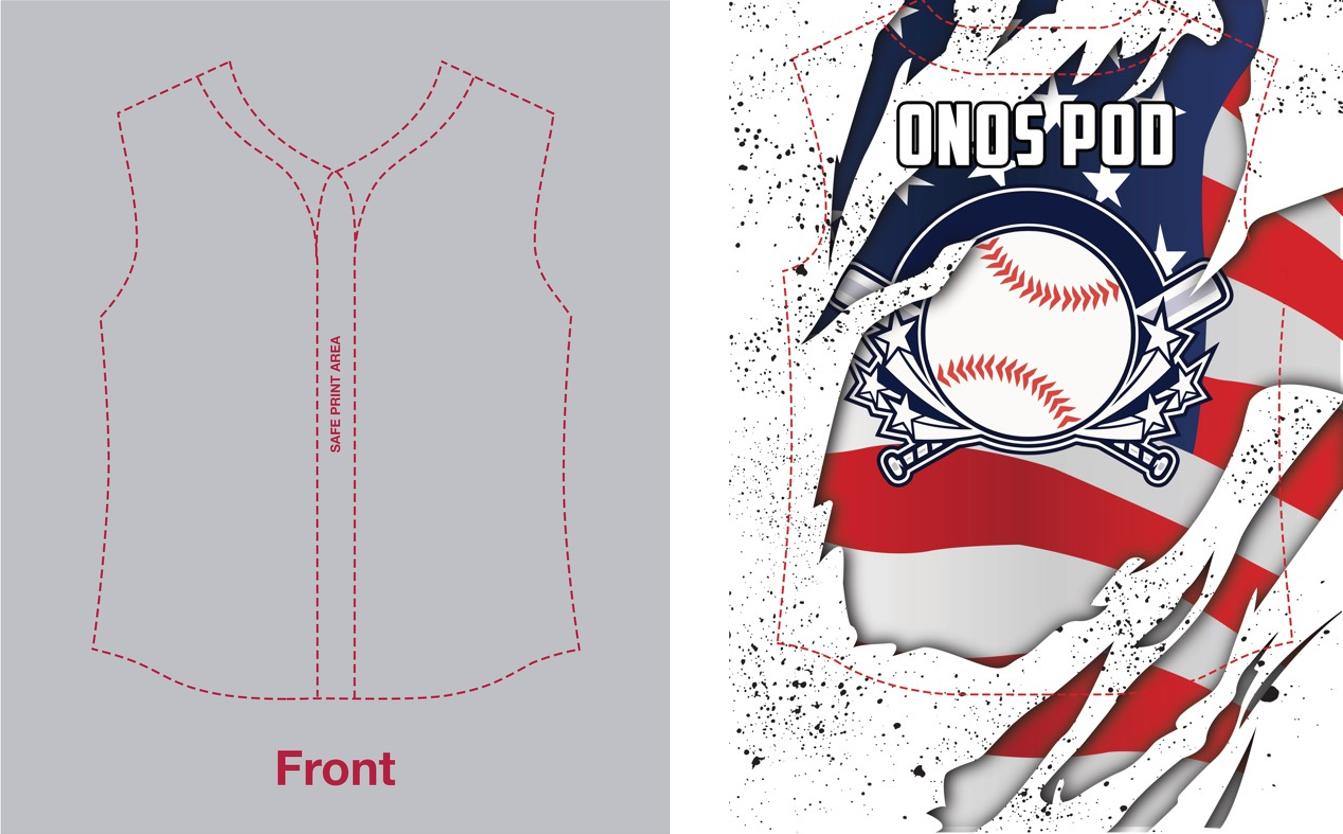
The file includes Front, Back, Right Sleeve, Left Sleeve, and Piping sections.
Red dashed lines = Safe Print Area. Keep all important text, logos, or elements inside these lines.
Grey area = Bleed Area. Your design should cover this area fully to avoid blank edges.
Red lines around the collar and center front mark where piping will be sewn.
Step 3: Add Your Design
In Photoshop: Click File > Place Embedded (or drag your design into the file).
In Photopea: Click File > Open & Place.Make sure key elements stay inside the red dashed lines.
To move your design: Use the Move Tool (shortcut V).
To resize: Press Ctrl + T (Photoshop) or Alt + Ctrl + T for Free Transform. Drag the corners to adjust.
Once your design is ready, turn off the guide layers and press Ctrl + S to save.
Step 4: Export Your Print-Ready File
Hide the Guide group and any layers you don’t want in the final print.
Export as PNG for a high-quality transparent file:
Photopea: File > Export As > PNG
Photoshop: File > Save As / Save a Copy > PNG, or File > Export > Quick Export as PNG
Your file is now ready to upload for printing your custom Baseball Jersey.
Need Help?
If design placement, sizing, or templates feel overwhelming, Onospod’s team can help prepare your files for perfect printing. Just contact us for support.

